Springtime is arriving! 🌼 It’s the perfect time for spring cleaning, lighter clothing and spring crafts for kids that boost creativity and keep children entertained at home.
We have you covered with 32 fun spring craft ideas to enjoy with your kids!
Toddlers, preschoolers and elementary-aged kids can have tons of fun with easy spring crafts for all ages. Check them out below (indoor and outdoor options included!)
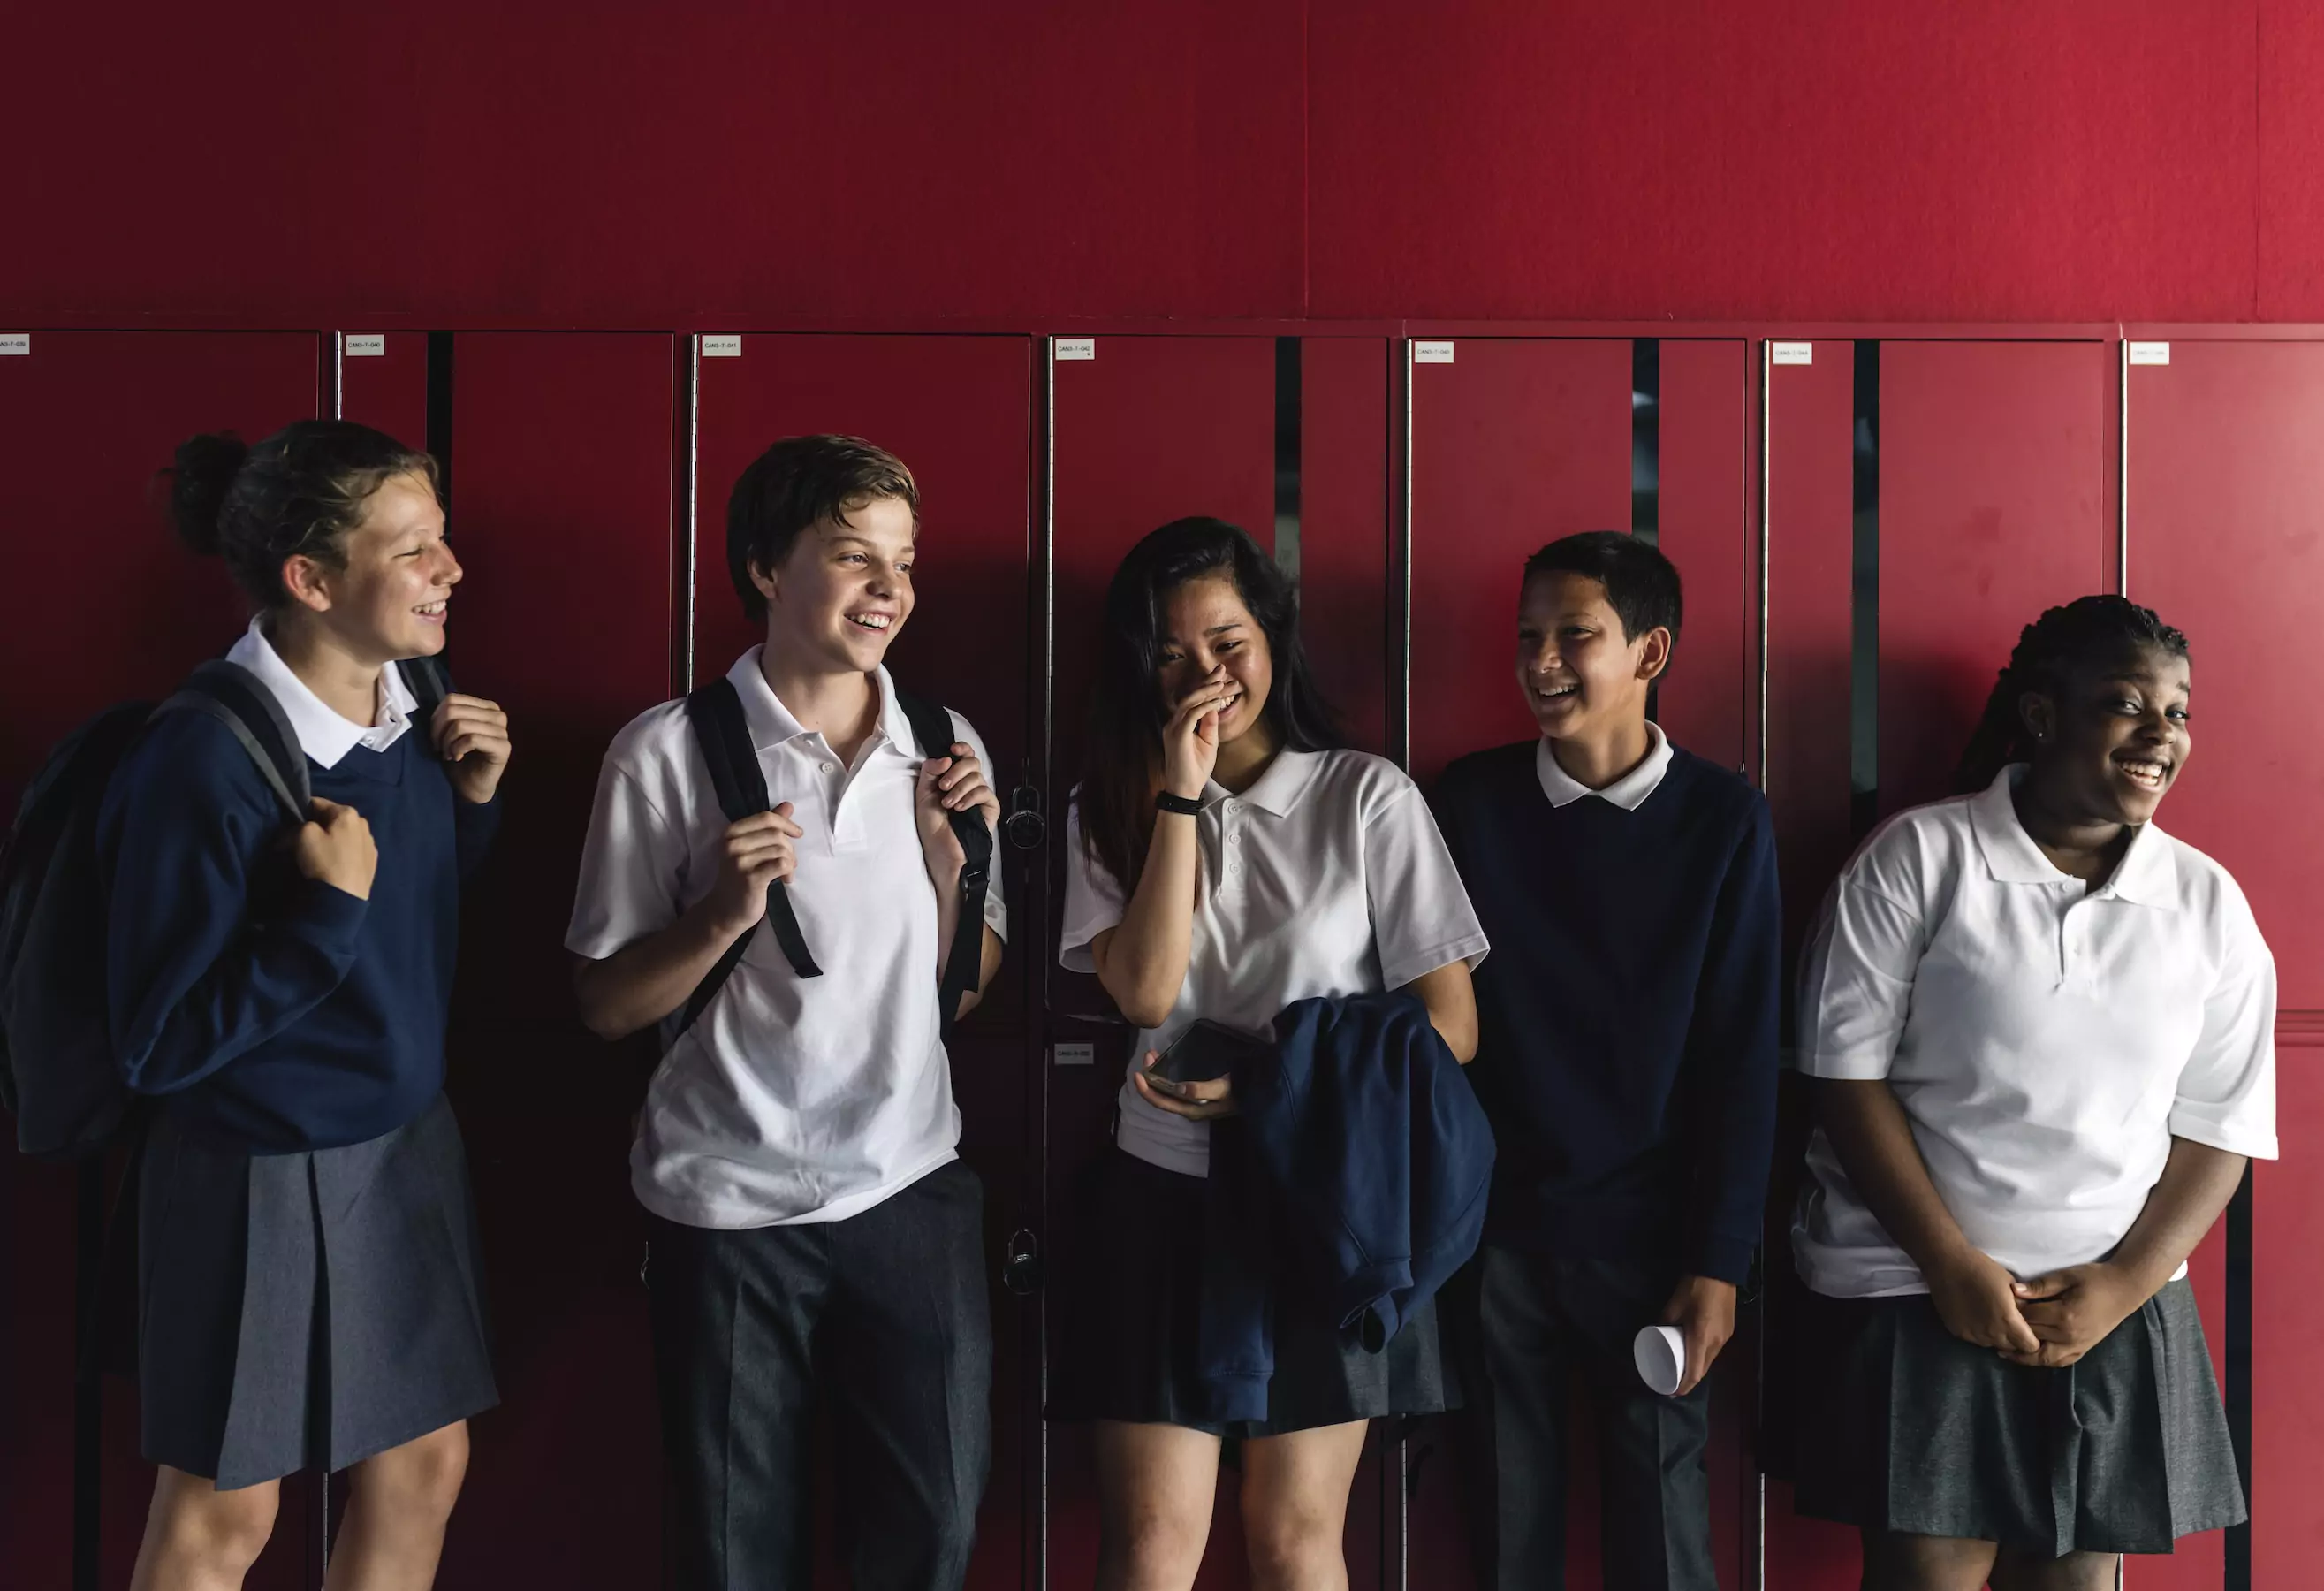
Want your child to have fun and learn at home this spring?
With the Prodigy Math and Prodigy English games, kids can escape to exciting virtual worlds, where they’ll answer curriculum-aligned math or English questions to succeed! While they're enjoying their adventures, you’ll get useful data and tools to support their learning.
Empower your child to love learning today.
Easy spring crafts for kids
1. Paper bag frog puppet
Materials: Printable frog template; paper lunch bag; green and pink paint; paintbrushes; scissors; glue; pencil; green, white, red and black cardstock.

This cute pal is sure to get your child in the spring mood. Plus, the craft project comes with an easy template to help you get started!
- Print out your frog pattern. Then cut out half eyelids, small circles for the speckles, and arms and legs from green card stock.
- Cut out the eyes from white and black cardstock. Set all pieces aside.
- Paint the paper bag using green craft or acrylic paint and allow to dry.
- Glue the black, green and white eye pieces together.
- Glue the eyes at the top of the bag. Once they've dried, glue the arms, legs and green speckles to the bag.
- Curl a rectangular piece of red card stock using a pencil to form the tongue and glue into place.
2. Spring finger puppets
Materials: Printer paper or construction paper; pencil; scissors; googly eyes; string or ribbons; markers; glue.
Help your child to draw and cut out animal and insect shapes to create exciting finger puppets they can play with for hours!
Cut and glue the paper to make a puppet, then add extra features like tiger stripes, ladybug spots, facial features and more.
3. Bookmark buddies
Materials: Popsicle sticks; paintbrushes; craft paint in a variety of colors; small pom poms with googly eyes; pipe cleaners; and your child's vivid imagination!
Not only do these adorable buddies encourage creativity blended with family time, your child can also develop a love for reading thanks to their new bookmarks!
There are tons of options for buddies your child can create: earthworms, ladybugs, bumblebees, or space aliens — to name a few!
4. Craft stick farm animals
Materials: Jumbo craft sticks; paint; paintbrushes; glue; googly eyes; buttons; beads; scissors; colorful felt.
Kids love farm animals, so celebrate spring with craft stick animals they can play with for hours.

Paint your sticks and apply googly eyes, felt for mouths and buttons for noses. They can make pigs, cows, chickens, horses or whatever else they'd like!
5. Spring printables
Instead of crafting from scratch, download free printable templates to get your spring crafts started on paper.
Try these:
- Spring coloring pages
- 10 Printable spring crafts for preschoolers
- 12 Spring-themed printables for your home
Butterfly and flower crafts for kids
1. Sponge butterfly painting
Materials: Acrylic paint; kitchen sponges; elastics; paper.
- For each butterfly, take a kitchen sponge and wrap elastic around the middle.
- Apply generous amounts of paint onto one side of the sponge in whatever pattern you’d like, then fold together to distribute paint onto the other side.
- Dab the sponge onto a piece of paper to create the butterfly.
- Add the body and antennae with a paintbrush as an extra detail.
2. Watercolor butterflies
Materials: Watercolor paper and paints; paintbrushes; butterfly wings template; black craft paint; pencil; googly eyes; pipe cleaners; pom poms; scissors; glue.

Here's a super cute way to make a beautiful butterfly and welcome the warm spring months ahead.
- Mix black paint with glue. Then use a disposable paintbrush to outline the butterfly with your glue mixture. Note: it may take up to 24 hours for the outlined butterfly to dry.
- Now comes the fun part: coloring the butterfly! Using watercolor paints, fill in the wings with shades of whatever color you’d like.
- While the watercolor paint dries, glue the googly eyes to the biggest pom pom to create the butterfly's face.
- Glue the pom pom near the top between the wings. Glue on three to four more pom poms to create the body.
- Use pipe cleaners to make antennae and see how lovely your butterfly looks!
3. Popsicle stick flowers
Materials: Painted craft sticks; buttons in different colors; glue.
Looking for a fun garden craft this spring? Try these cute faux flowers!
- Paint the craft sticks and allow to dry.
- Embellish with creative pieces like buttons.
- Use four sticks to form a flower and one green stick for the stem.
- Apply glue to the middle of the flower and place the button on top.
- Once it’s dry, put your new flowers in potted indoor plants or in your garden for the whole family to enjoy.
4. Cotton ball cherry blossom painting
Materials: Mixed media paper or cardstock; acrylic paint (blue, dark brown, pink and white); cotton balls; paintbrushes; plastic disposable plate to use as a palette; mason jar or recyclable container to hold clean water; clothespins (optional).

Cherry blossoms are a beautiful reminder that spring is finally here. What better way to celebrate the season than with a lovely painting of them?
- Grab a sheet of paper and begin painting it blue. Let dry.
- Squeeze puddles of pink, white and brown paint on the plastic plate.
- Using brown acrylic paint and a brush, apply thick and thin lines to represent a tree branch and smaller branches. Allow to dry.
- Use a clothespin to hold the cotton ball (if you want). Dip the cotton ball into pink paint and dab the ends of the branches with small blobs of color.
- Dab the cotton ball into pink, then white paint for a lighter shade. Apply gentle spots of light pink on top of the darker pink.
There you have it — a gorgeous new cherry blossom painting! 🌸
5. Paper tulips
Materials: Construction paper (yellow + other bright colors of your choice); scissors; glue; green wire
Embrace the bloom of spring with the pretty paper flower petals on your crafty bouquet of tulips!
- Cut your brightly colored construction paper into the shape of your petals.
- Fold the paper, then poke a hole in the bottom of the flower.
- Cut fringes into a rectangle of yellow construction paper.
- Wrap the yellow paper around your wire to make the middle of your tulip. Use glue to hold it in place.
- Place the wire into the middle of your folded paper flower. Repeat until you have a full bouquet.
6. Mother's Day flower pot
Materials: Flower pot template; paper cardstock in white and red purple or pink; green craft sticks; glue; thin ribbons in different colors; hole punch; scissors; markers.

Kids love making crafts as gifts for their parents on birthdays and holidays. And with Mother's Day right around the corner, your child's creativity and love can shine through with a heartfelt paper flower pot gift just for mom.
- Print the flowerpot onto brown cardstock and print the flower petals on red, purple or pink paper. Print a Mother's Day tag on white paper.
- Cut out the flowerpot and petals.
- Glue the back of the tag and place it onto the flowerpot. Your child can write a sweet message for mom on the tag.
- To make the flowers, fold two petals in half and glue onto one open flower petal. Repeat this step to make two more flowers.
- Glue the flowers near the top of three craft sticks. Allow to dry.
- Glue the craft sticks to the back of the flowerpot.
- Tie a piece of colorful ribbon to the front to complete the look.
Easter crafts for kids
1. Easter bunny paper plates
Materials: paper plates; colorful construction paper; pipe cleaners; pom poms; googly eyes; glue
Put old paper plates to good use with this fun and easy Easter-themed craft! To transform your paper plate into a cute bunny face, decorate your plate with construction paper for ears, a pom pom for a nose, a pipe cleaner for whiskers and googly eyes.
2. Easter cards
Materials: Easter card template (or draw your own design!); blank cards; cardstock paper in a variety of colors; googly eyes; pencil; scissors; glue; colorful markers.

Now is the perfect time to help your child make Easter cards and send them to family or friends!
- Using cardstock, cut out shapes and glue onto the cards to represent cute animals, like chicks or bunnies.
- Add googly eyes for that whimsical touch and you're done!
3. Toilet paper roll bunnies
Materials: Toilet paper rolls; small googly eyes; white acrylic paint; black marker; pipe cleaners in pastel colors; white and colored cardstock; small pom poms.

Toilet paper rolls come in handy, especially with Easter on its way. Celebrate the season by making some cute and easy Easter bunnies!
- Paint the toilet paper rolls white. Set aside and allow them to dry.
- Draw bunny ears on white and colored cardstock. Make the color shapes smaller to place them over the white ears.
- Glue two small googly eyes to the paper roll.
- Twist the pipe cleaners into whiskers and glue those pieces to the roll.
- Use a drop of glue to add a cute pom pom as a nose to the center of the whiskers.
- Draw a mouth using a black marker.
Spring DIY projects for kids
1. Garden fairy door
Materials: Popsicle sticks; green acrylic paint; hot glue gun and glue sticks.

Unleash your child's imagination with this sweet little door to prop up against a tree and invite fairies to your yard!
To begin:
- Paint the sticks and allow to dry.
- Place the sticks side by side and glue together along the narrow edges.
- Parents: glue a doorknob on the new fairy door with hot glue.
2. Drink coasters
Materials: Popsicle sticks; acrylic paint colors; paintbrushes; glue.
You've probably seen adults make pallet furniture for their patios. Why not get kids involved in the pallet craze with fun coasters for their favorite drinks?
- Apply glue to the narrow edges of the top and bottom part of three sticks and place on the flat side of two parallel sticks.
- Glue and lay popsicle sticks along the thin edges, but be sure to leave small gaps between each stick for that "pallet look."
- As soon as the paint is dry, paint the slats or leave them plain.
Tip: make multiple coasters to enjoy at your child's next tea party!
3. Beach sign
Materials: Large popsicle sticks; light blue acrylic or craft paint; paintbrush; seashells; sand, small pebbles; a length of twine; glue.
Hang this super cool sign up on your wall to commemorate fun family times at the beach!
To make this beautiful piece of art:
- Paint the popsicle sticks light blue (tip: leave some areas without paint for a washed-away look) and let dry overnight.
- Glue the popsicle sticks together along their narrow edges. Allow to dry.
- Write on your sign with glue and put small pebbles along the glue letters.
- Apply glue evenly to the bottom few popsicle sticks and place sand over the glue. Shake off excess.
- Once dry, glue on seashells and a piece of twine to hang your new beach sign.
4. Spring treasure box
Materials: Painted popsicle sticks in a variety of colors; craft glue.

Use pre-painted sticks or apply craft paint in your favorite colors to create this fun treasure chest for storing toys and trinkets.
- Place the sticks to form a square and put a drop of glue in the corners to hold them together.
- Keep applying glue to the corners and layer sticks on top of the other, until you have a box as tall as your child wants.
Don’t forget a lid on top to hold those secret treasures!
More fun spring craft ideas
1. Popsicle stick barn
Materials: Popsicle sticks; glue; red and white acrylic craft paint; paintbrush; cardboard box; small pebbles; dollar store green hay; burlap scraps; animal figurines and other dollar store finds.

Parents are encouraged to create this adorable barn and mini world with their kids, as the design is a bit more involved than other stick crafts.
Just follow these easy steps:
- Glue together popsicle sticks and attach to the cardboard box.
- Paint the sticks and cardboard using red and white paint. Allow to dry.
- Decorate your new farm with your child!
2. Spring finger paintings
Materials: Finger paints; brushes; thick cardstock.
Get your kids excited to use their fingers and brushes to create abstract paintings in spring-themed colors. All kids need is the creative drive to make something beautiful they can display at home!
3. Popsicle stick bracelets
Materials: Jumbo craft sticks; rubber band; small cup to use as a mold; pot of boiling water (with parent supervision!)
- Boil a pot of water and add popsicle sticks. Keep in mind, one or two sticks will break as you try to bend them.
- Keep the sticks in the water for 15 minutes, to ensure they're pliable and easy to work with.
- Remove the sticks and gently bend them around the cup. Use the elastic to ensure the stick remains around the cup. Leave the sticks to dry for 24 hours or more.

Then let your child decorate their new stick bracelets with paint, glitter or spring-themed decorations!
4. Toilet paper roll owls
Materials: Toilet paper rolls; black marker.
This is one of the least expensive and most fun ways to recycle toilet paper rolls!
Let your kids use their imagination to draw unique and interesting faces for their cute little owls, then push down on the tops of the rolls to form their pointy ears.
5. Rainbow windsock
Materials: Toilet paper roll; blue paint; scissors; white paper; markers; tissue paper in a variety of colors; string.

April showers bring May flowers, but all that rain brings something else, too — rainbows! For rainy days, here’s a fun craft to help your child make their own. 🌈
- Paint the roll in blue and set aside to dry.
- Outline and cut out a cloud from the white sheet of paper.
- Draw a smiley face on the cloud and glue it onto the dry toilet paper roll.
- Cut long pieces of tissue paper and glue them inside the bottom of the roll.
- Punch a hole through two sides of the paper roll and thread the string through both holes.
- Tie a knot five to six inches above the top of the roll to hang up your new colorful windsock.
6. Paper Popsicles
Materials: Colorful construction paper; scissors; glue; regular-sized popsicle sticks.

These paper popsicles are a fun and inexpensive way to welcome warmer weather as spring arrives.
Using basic cut and pasting, kids can have hours of excitement shaping construction paper into rectangles and circles with scissors.
7. Poured paintings
Materials: Acrylic paint; disposable plastic cups; white cardstock or mixed media paper.
- Pour acrylic paint into small plastic cups.
- Let your child pour paint from the cups onto random areas of their paper to produce fun and interesting designs. Tilt the paper for an extra cool effect.
8. Hula dancer and mermaid
Materials: Toilet paper rolls; colorful construction paper; glue; scissors; markers; acrylic paint, a paintbrush or two.
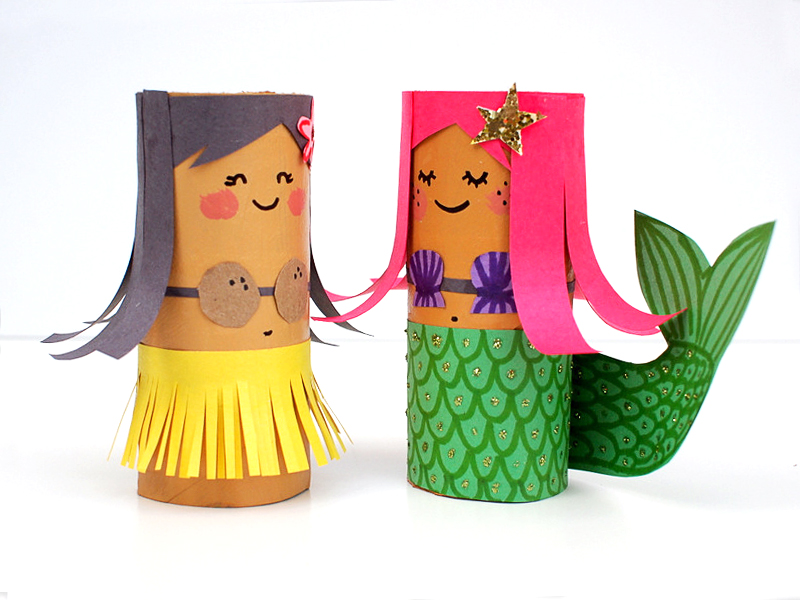
Turn toilet paper rolls into cute pals your child can take wherever they go! Kids can get extra creative with this craft and decorate their dolls however they want.
- Mix paint colors together to create a peach or tan color for the skin tone (try orange and white with a hint of green). Once you achieve the desired color, paint the rolls and allow them to dry.
- Draw faces using black and pink markers.
- Cut long pieces of construction paper to make the hair for each character.
- Cut out a yellow rectangle and make several snips along the long edge to make a hula skirt. Use glue to attach these pieces to the toilet paper roll and let dry.
- Cut a green rectangle, fins and tails for the mermaid. Add design details to complete the look.
Benefits of crafts for kids
With the spring crafts above, you can keep your child entertained all season! But did you know they can also benefit your child’s development?
There are a multitude of reasons parents should encourage kids to take part in regular arts and crafts.
Benefits can be seen in your child’s:
- Confidence — Crafts are an enjoyable creative outlet that helps kids achieve a sense of accomplishment from their creations.
- Mood — Creative expression helps kids stay engaged and happy. It can also help relieve stress and give kids a safe way to process painful emotions or bumpy life transitions.
- Learning and memory — Art can accommodate different learning styles and help them learn while they create. Plus, kids rarely forget an activity they love!
- Motor skills — Artistic adventures can promote neural development and sharpen motor skills. For instance, getting used to holding a pencil or paintbrush can develop dexterity, and coloring between lines can improve fine motor coordination.
BONUS spring craft ideas for kids of all ages
These extra crafts are perfect if you're looking for more creative ways to celebrate spring.
- Paint rocks using acrylic paints, brushes and large crochet hooks dipped in paint to create big dots.
- Make stained glass windows with colorful tissue paper and black construction paper.
- Build party hats from construction paper, pipe cleaners and other art pieces.
- Decorate terra-cotta pots with paint and varnish.
- Fill squirt guns with watered down paint and spray onto pieces of paper.
- Create egg carton animal crafts like turtles or caterpillars.
Ready to get crafty this spring?
These easy spring crafts for kids are a perfect way to start building a lifetime of artistic development and appreciation. It's also a wonderful way to bring the family together to create art in the safety and comfort of home!
Keep the fun going all spring with Prodigy!
Check out these resources to learn more about how much fun learning can be with Prodigy!